Scheduler
Scheduler
The Scheduler enables automated report generation and delivery, eliminating the need for manual report creation and distribution.
What is a Scheduler?
A Scheduler is an automation rule that:
- Triggers at specified times (daily, weekly, monthly)
- Generates reports with fresh data
- Delivers results to specified destinations (email, file transfer)
Key Features
Schedule Configuration
- Frequency — Daily, weekly, monthly, or custom intervals
- Time Selection — Choose exact time for execution
- Timezone Support — Schedule in your local timezone
Delivery Options
| Destination | Description |
|---|---|
| Send reports directly to recipients | |
| File Transfer | Push files to external systems (FTP/SFTP) |
| Telegram | Receive notifications and quick reports |
Schedule Management
- Suspend/Unsuspend — Temporarily pause schedules without deleting
- Test Mode — Verify configuration before activating
- Execution History — Track successful and failed runs
Common Use Cases
| Use Case | Configuration |
|---|---|
| Daily Sales Summary | Every day at 8 AM, email to sales team |
| Weekly Performance Report | Every Monday, email to executives |
| Monthly Financial Export | First of month, file transfer to finance system |
Business Value
- Time Savings — Eliminate manual report generation
- Consistency — Same reports delivered reliably on schedule
- Timeliness — Stakeholders receive information when they need it
- Reduced Errors — Automated processes eliminate human mistakes
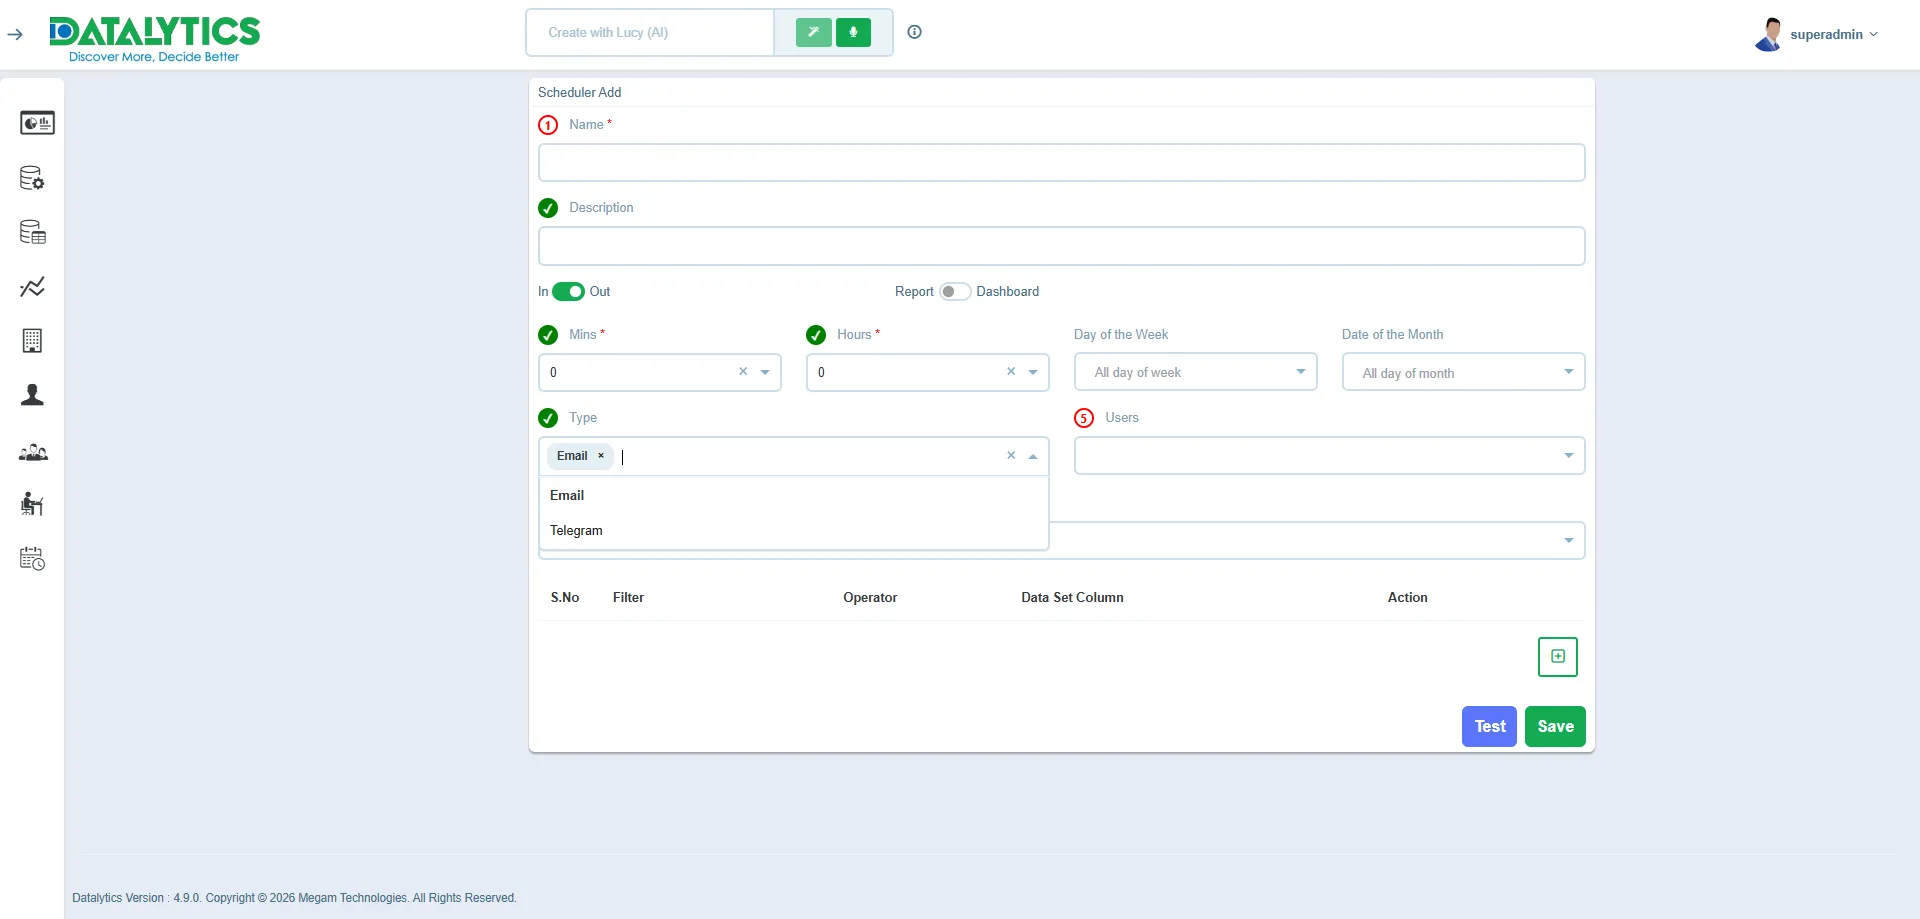
How to use the Scheduler Add Page
To schedule and send reports and dashboards through Email and Telegram, follow these steps:
1. Access the Schedule Creation Page
Navigate to the Scheduler section in the left sidebar and click on the + Add Schedule button.
2. Configure Basic Information
- Name: Enter a unique name for your schedule.
- Description: (Optional) Add a brief description.
- Item Type: Select whether to schedule a Report or a Dashboard.
- Select Item: Choose the specific report or dashboard from the dropdown list.
3. Set the Frequency
Define when the report should be generated and sent:
- Frequency: Choose from Daily, Weekly, Monthly, or Custom (Cron).
- Time: Select the time of day for execution.
- Timezone: Ensure the correct timezone is selected.
4. Configure Delivery Channels
- In the Delivery Channels section, enable Email.
- Recipients: Enter the email addresses of the recipients (comma-separated).
- Subject: Customize the email subject line.
- Body: Add a custom message to the email body.
- Format: Select the attachment format (PDF, Excel, CSV, PNG).
Telegram
- Enable Telegram as a delivery channel.
- Bot Token: Enter your Telegram Bot Token.
- Chat ID: Enter the target Chat ID or Channel ID.
- Message: Add a custom text message to accompany the report.
5. Review and Save
Review your configuration and click Save to activate the schedule. The scheduler will now run automatically based on your settings.